Configuring and Running the First Scan 
Configuring and Running First Scan Manually
For running a simple scan, we must complete the following steps:
- Creating a target
- Creating a task
- Running the task
Creating a Target
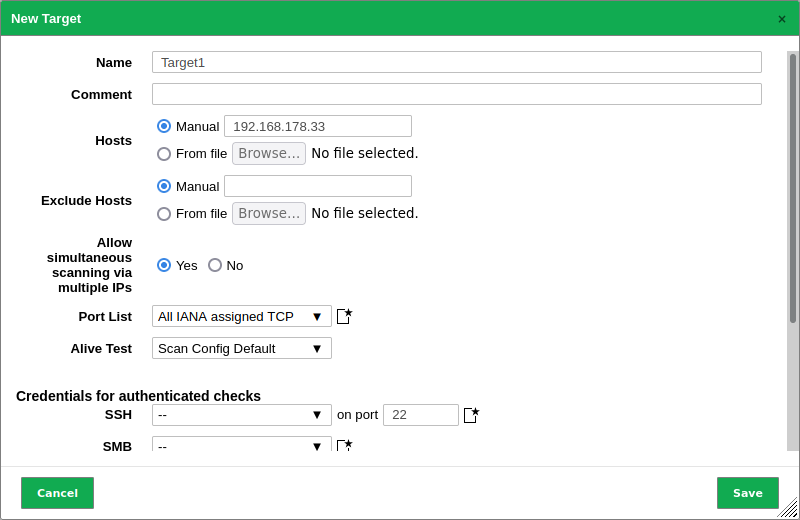
The first step is to define a scan target as follows:
- Select Configuration > Targets in the menu bar.
- Create a new target by clicking
.
- Define the target.
The essential settings are the target name and the host to be scanned. We can leave the other settings as they are.
For defining the host, we can use (and mix) the following options:
- Single IP address, e.g., 192.168.15.5
- Hostname, e.g., mail.example.com
- IPv4 address range in long format, e.g., 192.168.15.5-192.168.15.27
- IPv4 address range in short format, e.g., 192.168.55.5-27
- IPv4 address range in CIDR notation, e.g., 192.168.15.0/24 (at most 4096 IP addresses)
- Single IPv6 address, e.g., fe80::222:64ff:fe76:4cea
- IPv6 address range in long format, e.g., ::12:fe5:fb50-::12:fe6:100
- IPv6 address range in short format, e.g., ::13:fe5:fb50-fb80
- IPv6 address range in CIDR notation, e.g., fe80::222:64ff:fe76:4cea/120 (at most 4096 IP addresses)
- Click Save.

Creating a Task
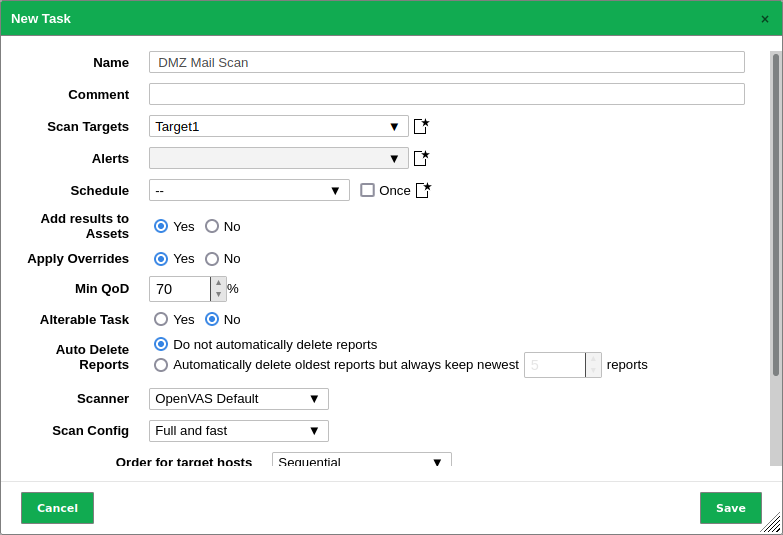
The second step is to create a task as follows:
- Select Scans > Tasks in the menu bar.
- Create a new task by moving the mouse over
and clicking New Task.
- Define the task.
The essential settings are the task name and the target we created previously. We can leave the other settings as they are.

- Click Save.
→ The task is created and displayed on the page Tasks.
Running the Task
In the row of the newly created task click .
→ The scan is running.
The report of a task can be displayed as soon as the task has been started by clicking the bar in the column Status.
As soon as the status changes to Done, the complete report is available. The intermediate results can be reviewed at any time.
Note
It can take a while for the scan to complete. The page will automatically refresh if new data is available.
